

Build a form
Create a custom form, add fields, put it on a website page, or set it up as a request form sent by email.
A custom form creates a new kind of record for your workspace, such as Suppliers or Contact messages, with its own list in the sidebar. You choose its fields, and you can let visitors fill it in on your website.
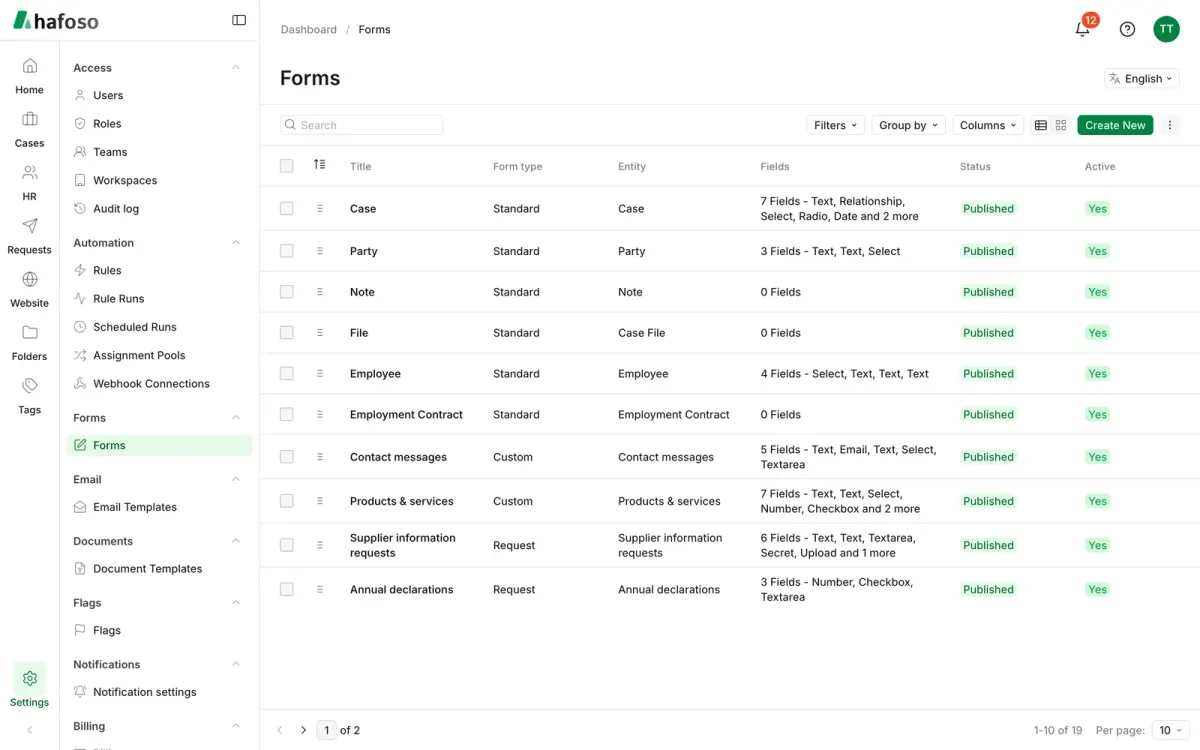
Create a custom form
Open Settings → Forms → Forms and select Create new.
Choose the Form type Custom. The form type can't be changed after saving.
Enter a Singular name and a Plural name (the plural is shown in the sidebar), and choose the Sidebar group where its list appears.
On the Fields tab, add your fields. Choose the Title field, whose value names each record in lists and search.
Select Save Draft to keep working, or Publish changes to put the form in use.
To have the records belong to a case, choose Cases as the Parent entity: each case then shows the form in its Forms tab. The parent can't change after the form is published.
Changes to a published form stay in a draft until you publish them. Your team and website visitors keep seeing the published version, so you can rework a live form safely.
Add fields
Pick a field type, such as Text, Textarea, Email, Number, Checkbox, Select, Radio, Date, Relationship or Upload, then give it a Label and, if useful, Help text. Tick Required for fields that must be filled in.
- Group fields with a Section, shown as a group, a collapsible block or a tab.
- Input method decides how a value is entered: Editable at any time, Submit-Only when the record is created, or Computed from other fields with an expression.
- A Display rule shows a field only when the record matches conditions you choose.
- Move to… moves a field into another section and keeps its values.
Put a form on a website page
On the form's Website tab, tick Accept submissions from the website.
Mark the fields visitors may fill as Public. Set the Submit button label and what happens After submitting: Show a message or Go to a page.
Under Emails, add the emails sent after each submission, for example to your team. Publish the form.
In the page editor, add a Form block and choose your form. See Edit pages.
Each submission becomes a record in the form's list, with Source set to Website. A form with a parent entity can't take website submissions.
Request forms sent by email
Choose the Form type Request to send a form to named people, such as suppliers or witnesses. Each person gets an email with a private link and fills in the form on your website. On the form's Requests tab you set:
- Due in (days) and whether to Close at due date.
- Reminders before, on and after the due date.
- Secure code: a 6-digit code sent in a separate email before the form opens: Off by default, On by default or Always.
- Response page, Notify when answered, Email templates and the Recipient sources people can be picked from.
Mark a field Internal for notes only your team sees and fills in. The link opens a website page with a Request form block; without a page of its own, it opens the Default request page set in Website → Site Settings, on the Requests tab. To send requests and follow the answers, see Review submissions.
Last updated on
Still need help?
Our team answers by email, usually within one working day.